In today’s digital age, keeping a consistent brand image is key to standing out in an ocean of content. And that’s why we at WOXO are thrilled to roll out our latest feature: the “Brand Kit”. This new feature is crafted to ensure every video you create is a true reflection of your brand’s identity. So, here’s how you can use it.
How to Set Your Brand on WOXO by using the “Brand Kit”
First of all you have to know that only Grow Plan users have exclusive access to this feature… So, knowing this, get your brand well defined and let’s get started!
Step 1: Click on Settings
Kick things off by heading to Settings icons before you jump into video creation. It’s in the right part of the prompt text field, near to the Generate button.

Step 2: Add Your Brand at the “Brand Kit” tag
Now, go to the Brand Kit tab.

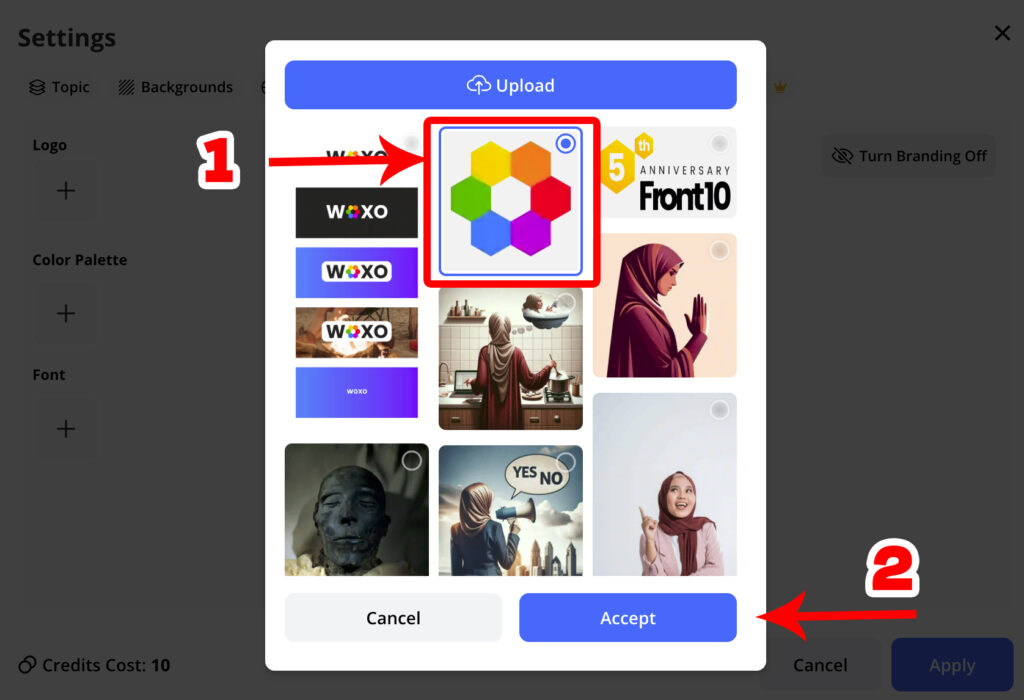
So, you’ll see the option to add your logo (+ symbol).
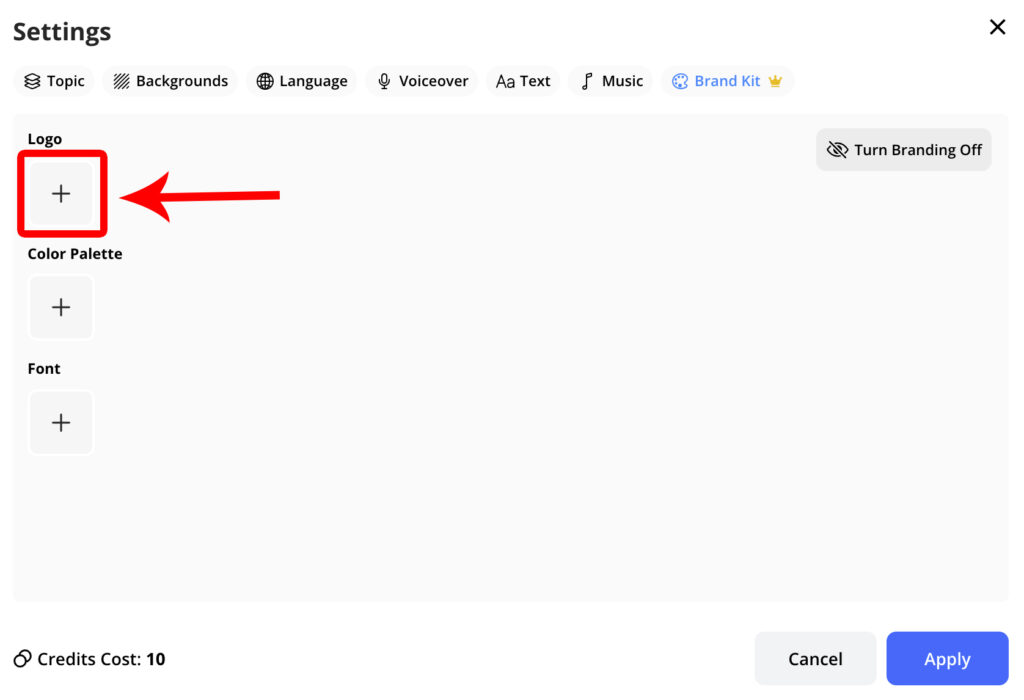
Click on the + symbol to upload a new logo.
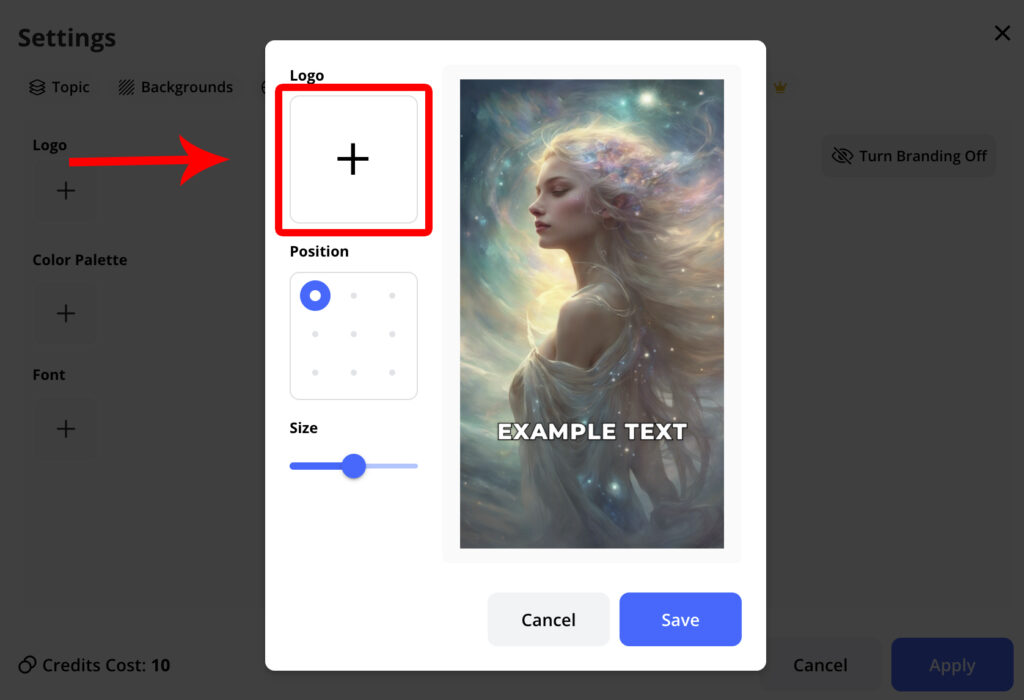
Now you can choose the image of your brand (if you have already uploaded it), or directly click on the Upload button to upload a brand. Once you have it among the images, select it and click on Accept.
And yes: we recommend placing it in the top left corner and adjusting its size so it complements your video without overshadowing it, like we show in the picture below.

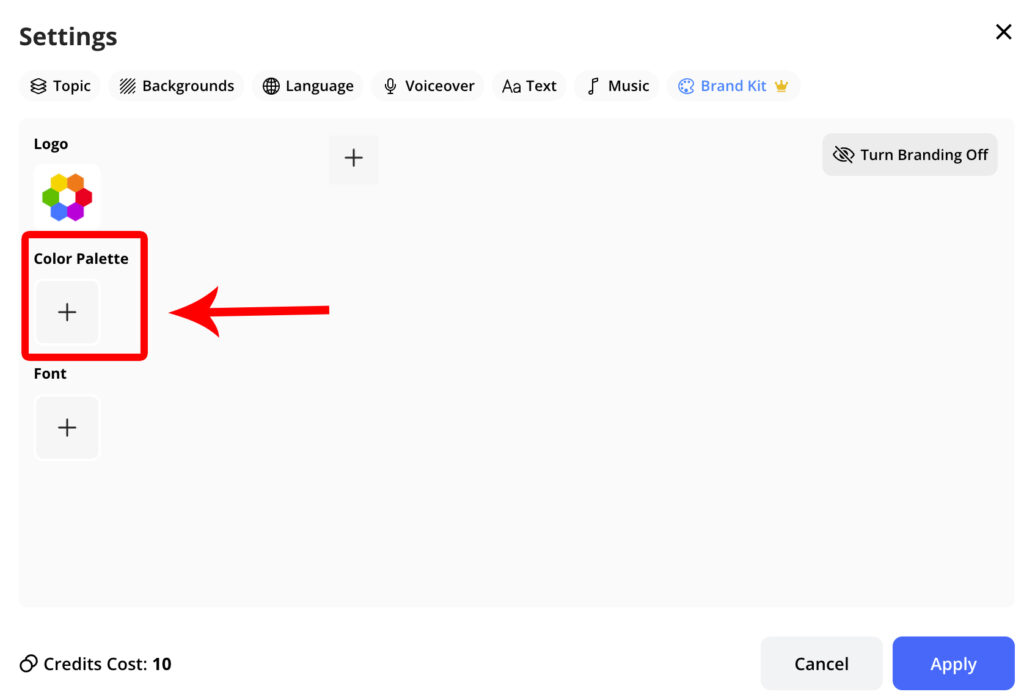
Step 3: Color Your Brand
Color is crucial for brand recognition. So, you can set the primary color by clicking on the + symbol above Color Palette tag.
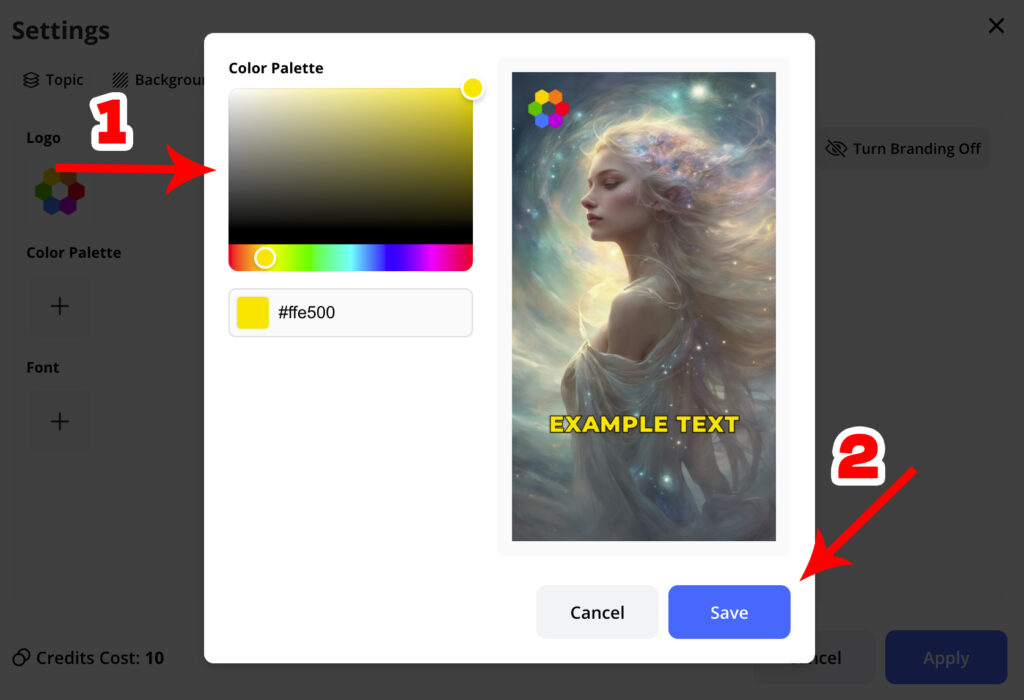
Now, pick a color (like step 1 in the image below). This color will be applied to the texts of your video, ensuring visual consistency that resonates with your audience. Don’t forget to click Save so that the changes are saved (like step 2 in the image below).
Step 4: Apply and… Voila!
Once you’re happy with the setup, don’t forget to hit Apply. Now, all your future videos will carry this brand configuration, and you ensure a consistent presence across all your video platforms.

Need to Tweak Your Brand Kit?
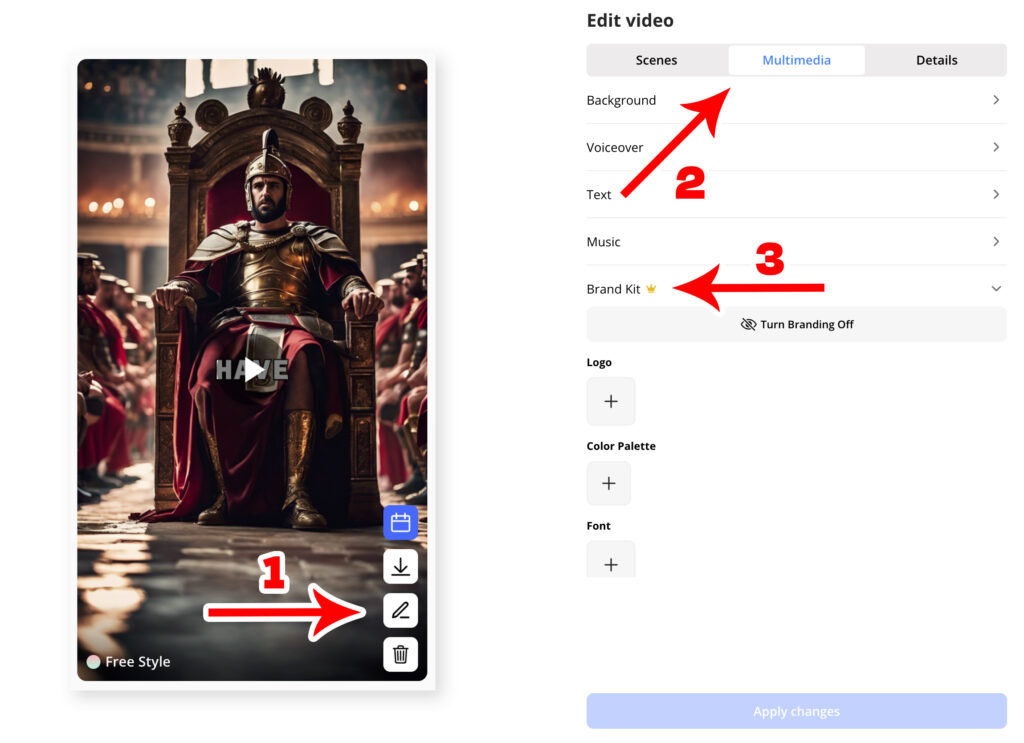
No worries, adjusting your brand is as simple as setting it up, so, if you’ve already created a video but want to tweak your brand settings, just:
- Click on Edit the video icon
- Then, select Brand Kit
- And follow the previous steps from 2 to 4 again.
What’s Next for the Brand Kit
We’re on new missions, so we’re already working on adding more features to the Brand Kit, like font customization and additional brand elements. Stay tuned for updates! From now you can read about new features in our Brand Kit in this article.
Try It Out and Share Your Thoughts about the “Brand Kit”
We invite all our Grow Plan users to dive in and play around with this new feature. Your feedback is gold, so don’t hesitate to let us know how it works for you in the comments. We’re here to make your content creation process as smooth and cohesive as possible. Give the Brand Kit a whirl today and take your video content to the next level!